个人博客搭建
hexo + Github 个人博客搭建
博客搭建
1. 环境搭建
==git + node.js + npm==
(进入官网进行傻瓜式安装即可)
安装完成后,可以打开终端查看版本,验证是否安装成功,如果有版本号说明安装成功了
git -v |
2. hexo 博客搭建
注意:==如果在终端中运行hexo命令,出现“在系统上禁止运行脚本的话”,win10系统可以通过下面方法解决==
打开“设置” -> 搜索“power” -> 进入“允许powershell脚本在不签名的情况下运行‘’ -> 勾选后点击“应用”
- 安装 hexo 框架,
win+R输入cmd进入在终端输入npm install hexo -g安装hexo框架。 - 安装完成后进入你要存放博客的文件夹位置,在当前文件夹下打开终端输入
hexo init <博客名>进行hexo框架初始化。

- 进入新建的博客文件,安装我们需要的依赖,打开终端输入
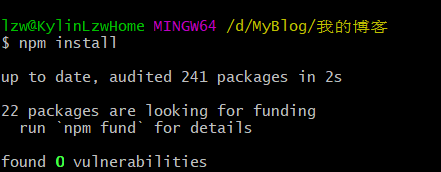
npm install, 等待安装。
- 安装成功后可以输入
hexo serve,这个时候 hexo 就运行在端口 4000 中,可以复制端口号在浏览器进行本地预览。

3. 将博客推送到github
-
在github中创建一个仓库,仓库名为
github用户名.github.io,注意要设置为public,这样才能让其他人访问。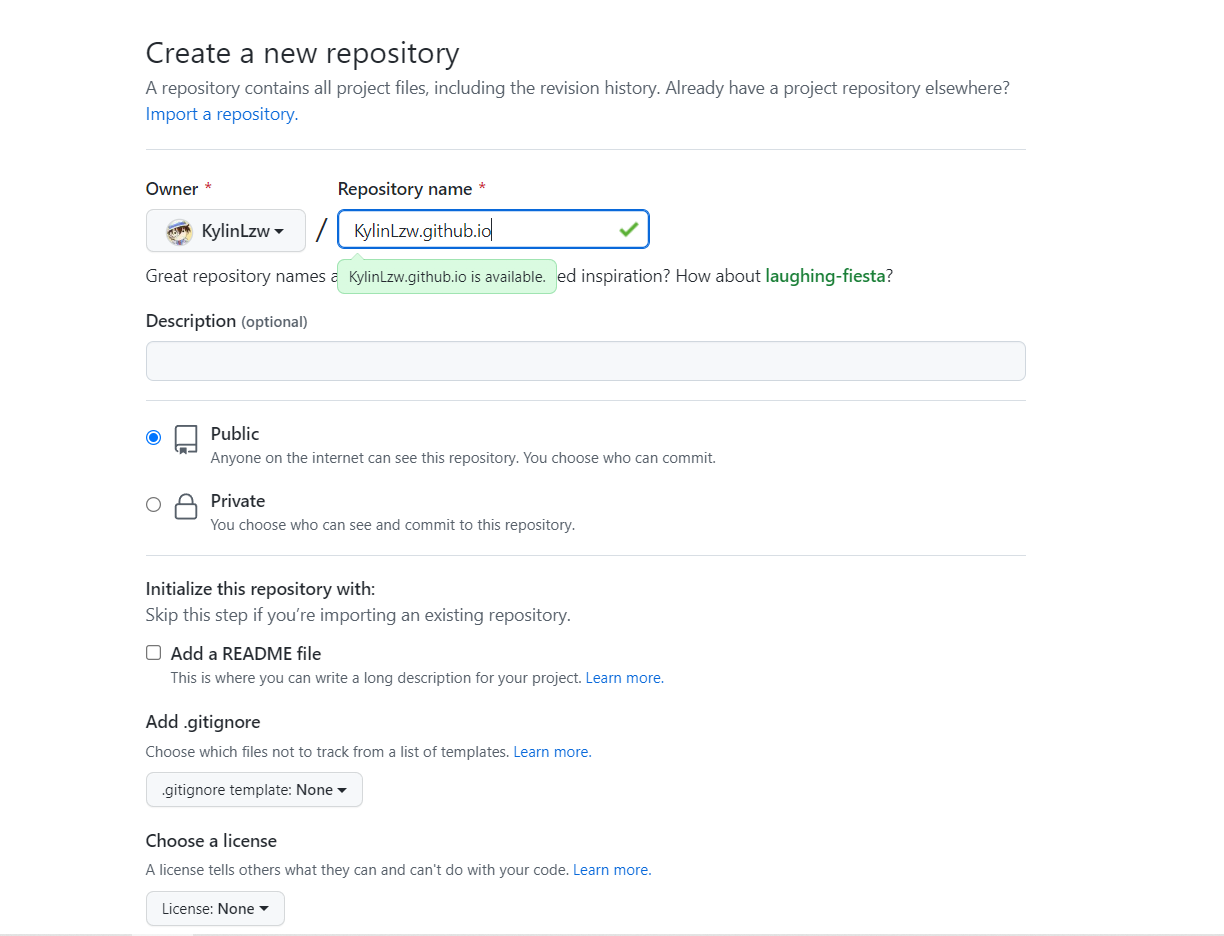
-
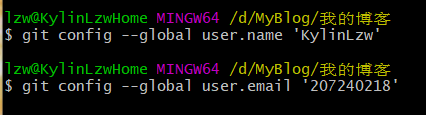
本地git链接到github。
-
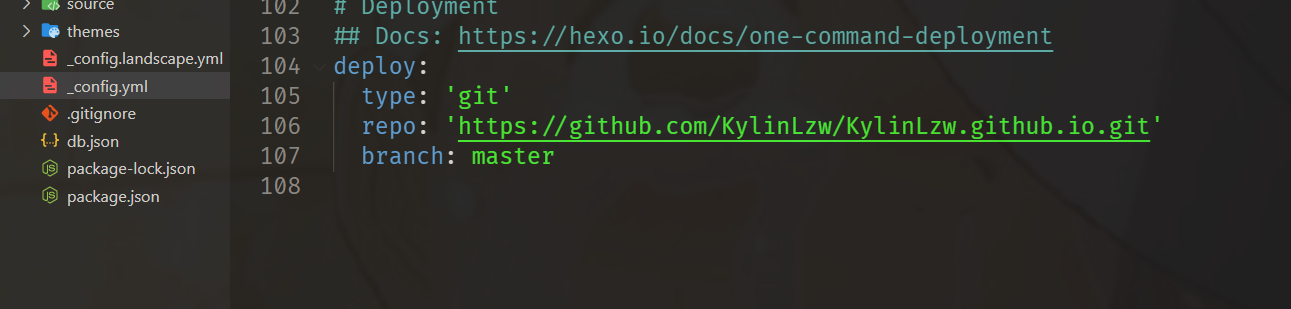
在本地博客文件中 _config.yml 文件修改配置,repo输入仓库的https地址
-
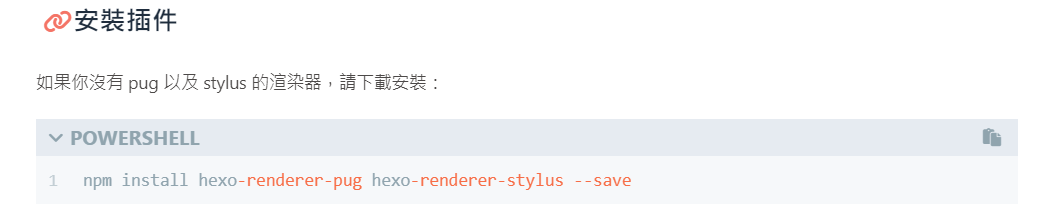
安装hexo在本地预览博客需要的插件

-
把本地文件上传到github:
hexo clean //清空缓存 |
注意:==如果觉得这三个操作太繁琐,那么可以在package.json文件中修改命令,把Server命令改为hexo clean && hexo generate && hexo server,就可以用hexo s达到三个命令的效果了==
- 上传成功后,在仓库中的setting中,github page开启服务,可以通过
github用户名.github.io访问
4. 配置博客
-
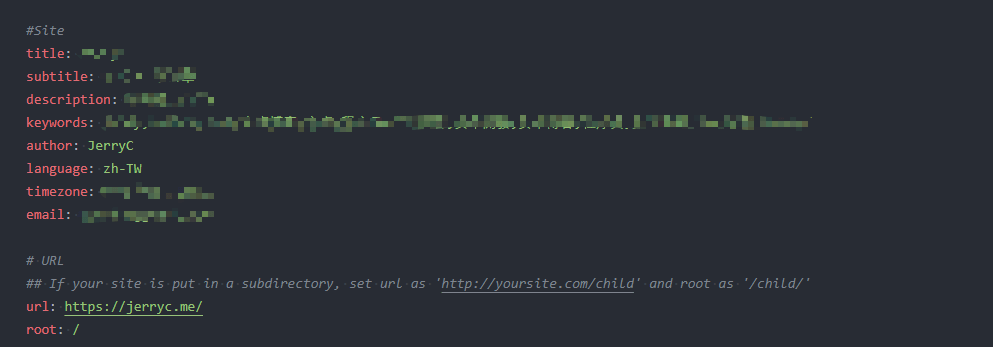
本地博客文件中 _config.yml 文件设置各个参数,language中文为:
zh-CN,url改为仓库地址,注意中文需要用utf-8保存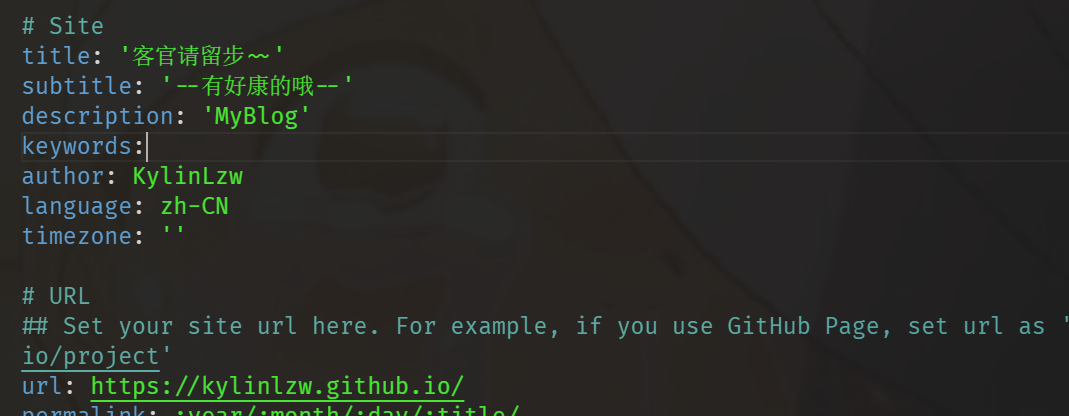
butterfly主题配置
1. 主题安装
-
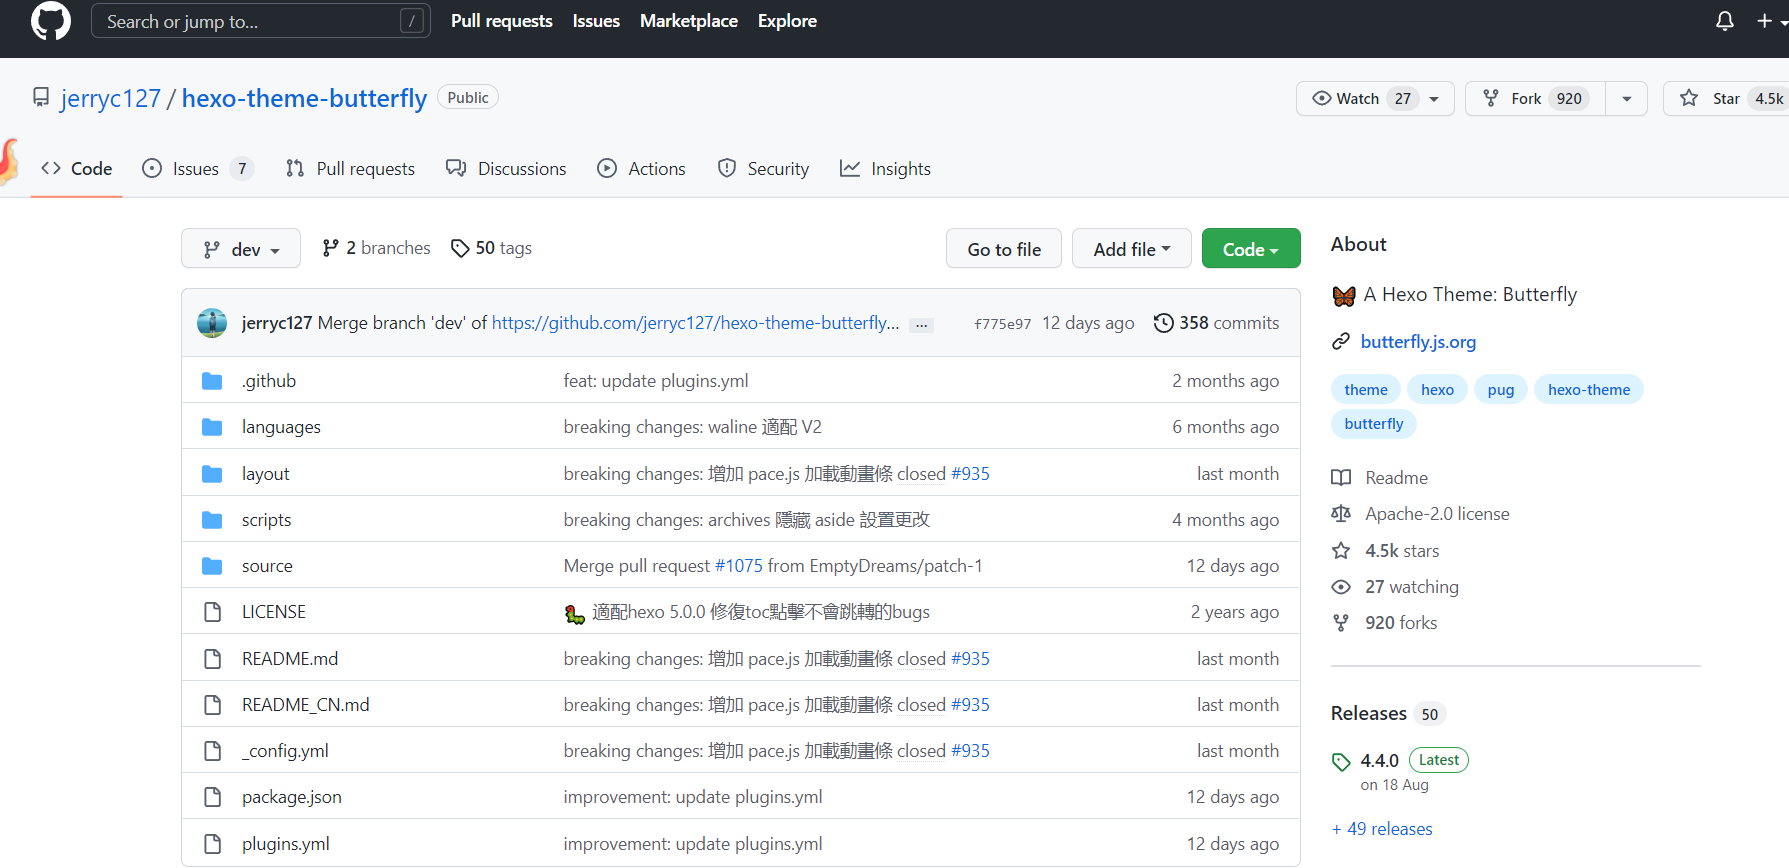
在github中搜索主题名称,阅览相关配置文件,在这里以butterfly作为主题,其他的主题操作方式大同小异。
-
在博客文件下输入
npm install hexo-theme-bufferfly进行安装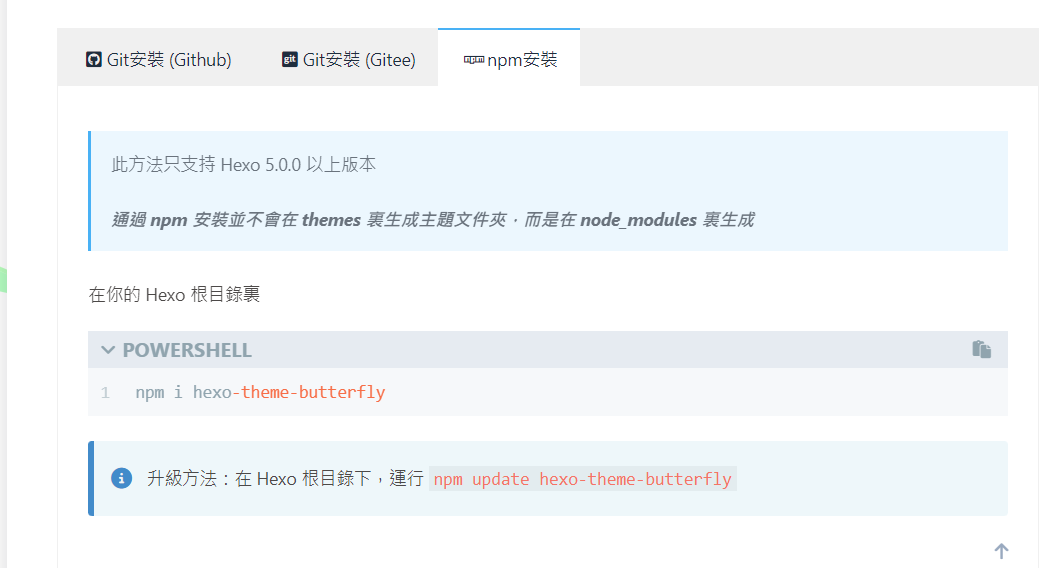
注意: ==npm安装失败==

A. 更换npm镜像
1.查看npm镜像设置 |
B. 输入 npm install -g npm更新npm版本
C. 输入 npm install hexo-theme-butterfly进行安装
- 应用主题:

- 到这里就安装成功了,可以清除缓存,然后在本地预览一下效果。
2. 主题页面配置
官方文档:https://butterfly.js.org/posts/21cfbf15/
-
标签页:
首先前往你的 Hexo 博客的根目录,输入
hexo new page tags创建标签页,可以找到source/tags/index.md这个文件,然后修改这个文件,在第三行添加type: "tags",title可以改为你想要的名称---
title: yyds
date: 2022-10-01 00:00:00
type: "tags"
--- -
分类页:
前往你的 Hexo 博客的根目录,输入
hexo new page categories,可以找到source/categories/index.md这个文件,修改这个文件,在第三行添加type: "categories",title可以改为你想要的名称---
title: 踏踏开
date: 2022-10-01 00:00:00
type: "categories"
--- -
友情链接:
A. 前往你的 Hexo 博客的根目录,输入
hexo new page link,可以找到source/link/index.md这个文件,修改這個文件,在第三行添加type: "link",title可以修改为你想要的名称---
title: 来,让我康康
date: 2022-10-01 00:00:00
type: "link"
---B. 添加友链,在Hexo博客目录中的source/_data(如果沒有 _data 文件夾,自行創建),创建一個文件link.yml,输入下面配置
- class_name: 友情鏈接
  class_desc: 那些人,那些事
  link_list:
    - name: Hexo
      link: https://hexo.io/zh-tw/
      avatar: https://d33wubrfki0l68.cloudfront.net/6657ba50e702d84afb32fe846bed54fba1a77add/827ae/logo.svg
      descr: 快速、簡單且強大的網誌框架

- class_name: 網站
  class_desc: 值得推薦的網站
  link_list:
    - name: Youtube
      link: https://www.youtube.com/
      avatar: https://i.loli.net/2020/05/14/9ZkGg8v3azHJfM1.png
      descr: 視頻網站
    - name: Weibo
      link: https://www.weibo.com/
      avatar: https://i.loli.net/2020/05/14/TLJBum386vcnI1P.png
      descr: 中國最大社交分享平台
    - name: Twitter
      link: https://twitter.com/
      avatar: https://i.loli.net/2020/05/14/5VyHPQqR6LWF39a.png
descr: 社交分享平台 -
404页面
-
主题內置了一個简单的404页面,可在设置中开启,访问出错的网站会跳到404页面。
# A simple 404 page
error_404:
  enable: true
  subtitle: "頁面沒有找到"
  background:
-
3. 站点配置文件_config.yml
-
语言和站点显示信息
-
导航菜单(标签名可以自行设置)

menu:
  Home: / || fas fa-home
  Archives: /archives/ || fas fa-archive
  Tags: /tags/ || fas fa-tags
  Categories: /categories/ || fas fa-folder-open
  List||fas fa-list:
    Music: /music/ || fas fa-music
    Movie: /movies/ || fas fa-video
  Link: /link/ || fas fa-link
About: /about/ || fas fa-heart -
代码样式和规格(阅读文档配置)
highlight_theme: ocean #  darker / pale night / light / ocean / mac / mac light / false
highlight_copy: true # copy button
highlight_lang: true # show the code language
highlight_shrink: false # true: shrink the code blocks / false: expand the code blocks | none: expand code blocks and hide the button
highlight_height_limit: 500 # unit: px  false
code_word_wrap: false -
社交链接设置
#   icon: link || the description
# 图标网站:https://fontawesome.com/icons
social:
  fab fa-github: https://github.com/KylinLzw || Github
  fas fa-envelope: 207240218@qq.com || Email
fa-sharp fa-solid fa-user: xxx.com || 个人 -
主页文章内容显示
# 1: description
# 2: both (if the description exists, it will show description, or show the auto_excerpt)
# 3: auto_excerpt (default)
# false: do not show the article introduction
index_post_content:
  method: 2
length: 500 # if you set method to 2 or 3, the length need to config -
背景图片设置
# Favicon(網站圖標)
favicon: "./img/头像.png"

# Avatar (頭像)
avatar:
  img: https://i.loli.net/2021/02/24/5O1day2nriDzjSu.png
  effect: false
disable_top_img: false
index_img: "./img/bg.jpg"
default_top_img: "./img/怪盗基德.jpg"
archive_img:
tag_img:
tag_per_img:
category_img:
category_per_img:

cover:
  index_enable: true
  aside_enable: true
  archives_enable: true
  position: both
  default_cover: true
    # - "./img/头像.png"
    - https://cdn.jsdelivr.net/gh/KylinLzw/MarkdownImage/img/20221021162053.png
# - https://fastly.jsdelivr.net/gh/jerryc127/CDN@latest/cover/default_bg3.png -
搜索功能配置
在终端输入
npm install hexo-generator-search --save,然后进行配置,在_config.butterfly.yml文件中local_search设置为true,在_config.yml文件中输入search:
path: search.xml
field: post
format: html
limit: 10000 -
设置背景,在_config.butterfly.yml文件中配置
# The formal of image: url(http://xxxxxx.com/xxx.jpg)
background: url(https://cdn.jsdelivr.net/gh/KylinLzw/MarkdownImage/img/五条悟.jpg)
# background: '#49B202'